IMPORTANT: Your laptop must have a Ethernet and USB port in order to connect to the classroom's camera.
1. Install OBS
Download the latest version of Open Broadcaster Software (OBS):
https://obsproject.com/download
Select your platform and click on "Download Installer":

Proceed with the installation.
Once the Auto-Configuration Wizard page opened, press "Cancel":

2. Connect computer ethernet

3. Connect computer audio

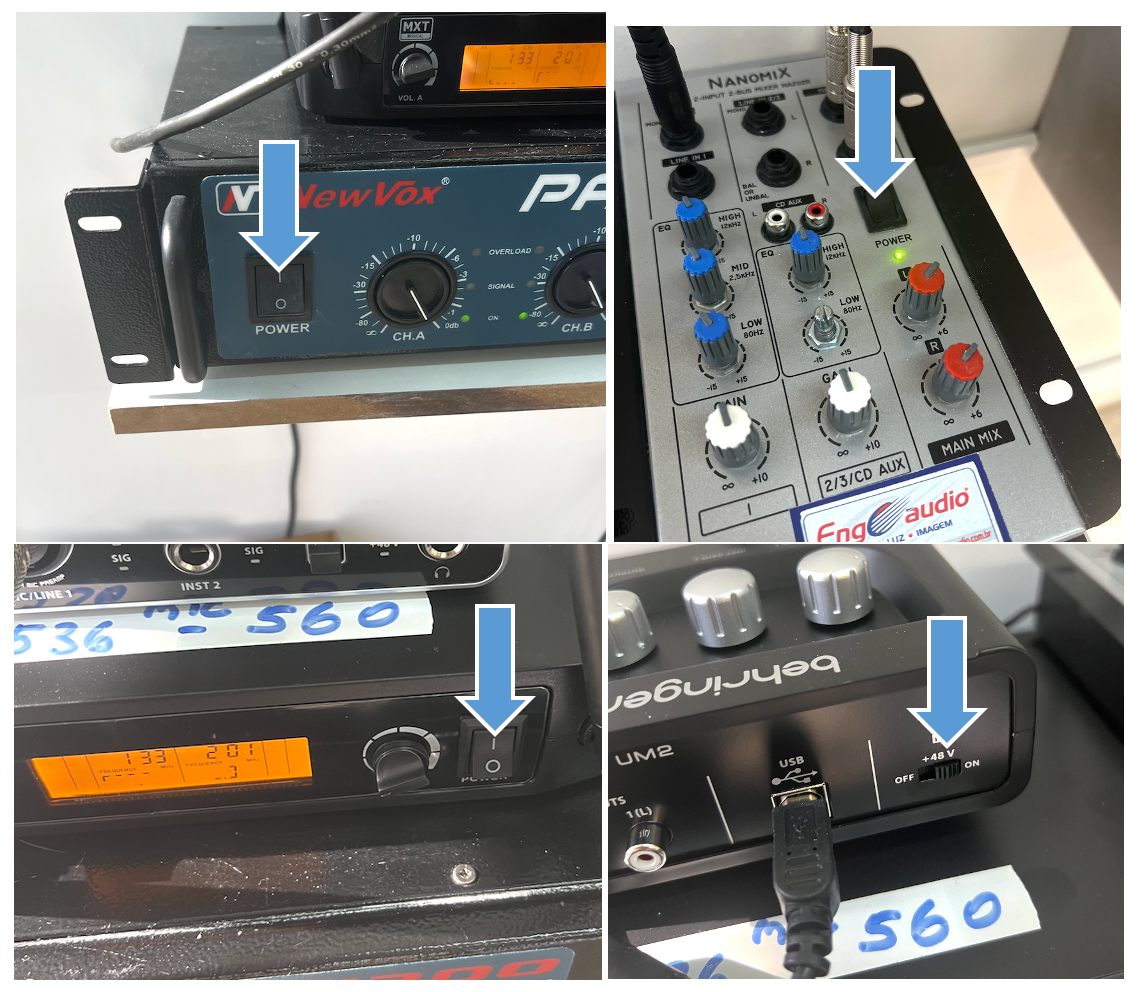
4. Turn on audio equipment
5. Add a new media source
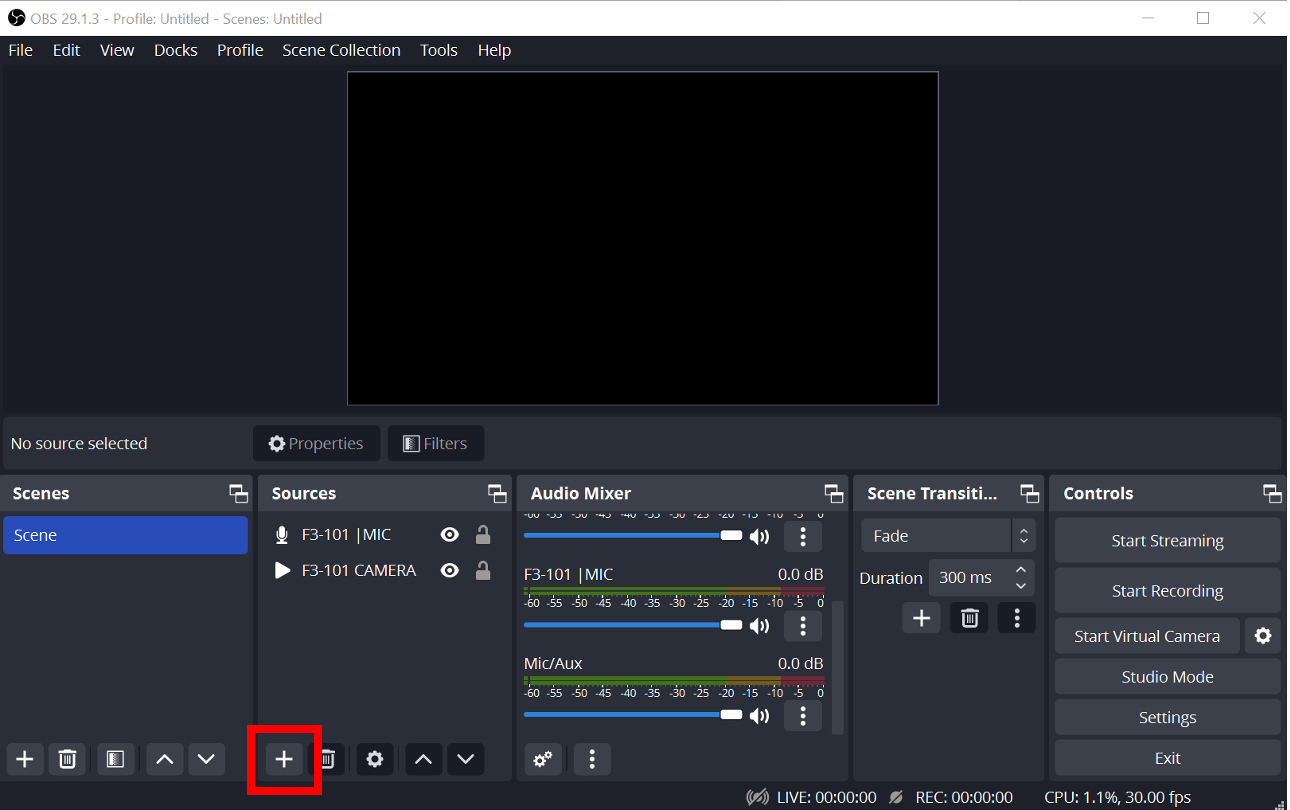
After downloading OBS, you will see the display shown below. Press the plus sign in the bottom left corner of the "Sources" box to add a new media source (camera). It is boxed in red below. You will see a lot of different sources you have the option to add. Click "Media Source".
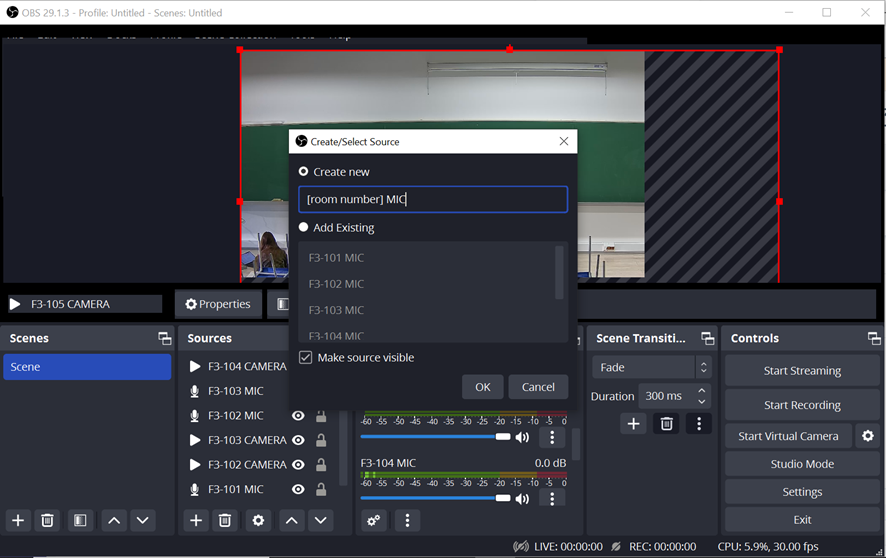
Next, you need to name your media source. It is suggested that you name it after the classroom number that you are in, and the word "CAMERA" afterwards. Press OK once you are done.

Uncheck the box that says "Local File" and your screen should look like the one below. In the box labelled "Input" type what is shown in the red box below. Replace "IP-ADDRESS" by the IP Address of the camera: 169.254.BUILDING.ROOM_NUMBER
Example:
For room F2-107, IP Address will be 169.254.2.107
Then, the final input will be:
rtsp://admin:enge@udio2020@169.254.2.107
After this, click OK.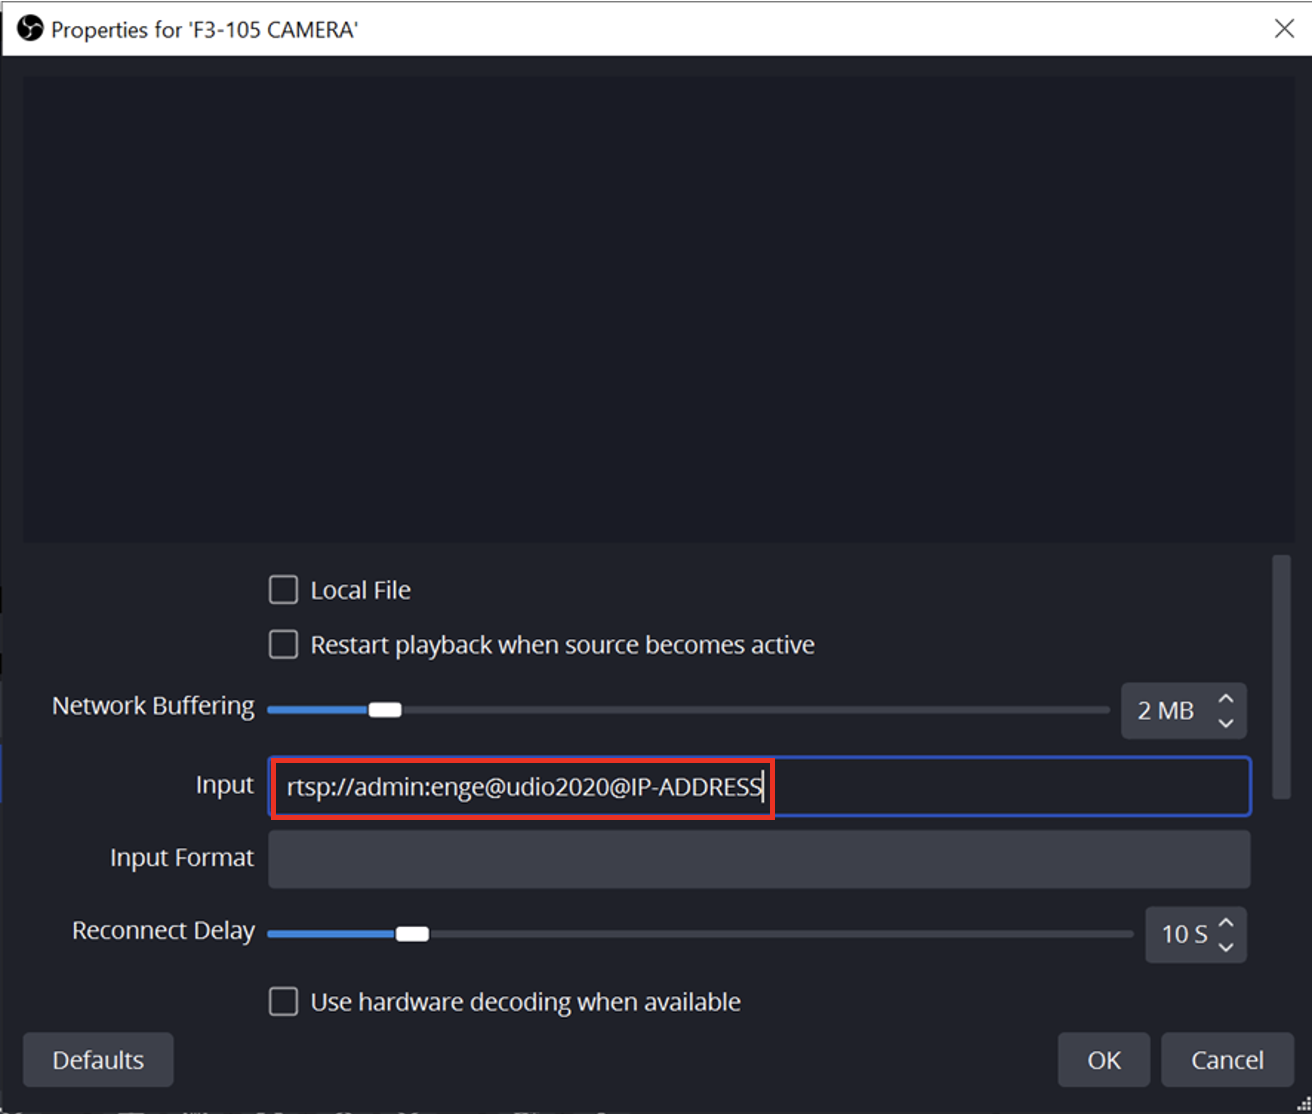
You have successfully added a media source! The camera view should now be displayed in the top portion of your screen.
6. Add a new Audio Input Channel
Press the plus sign in the bottom left corner of the "Sources" box to add a new audio source (microphone). It is boxed in red below. You will see a lot of different sources you have the option to add. Click "Audio Input Channel".
Next, you need to name your audio source. It is suggested that you name it after the classroom number that you are in, and the word "MIC" afterwards. Press OK once you are done.
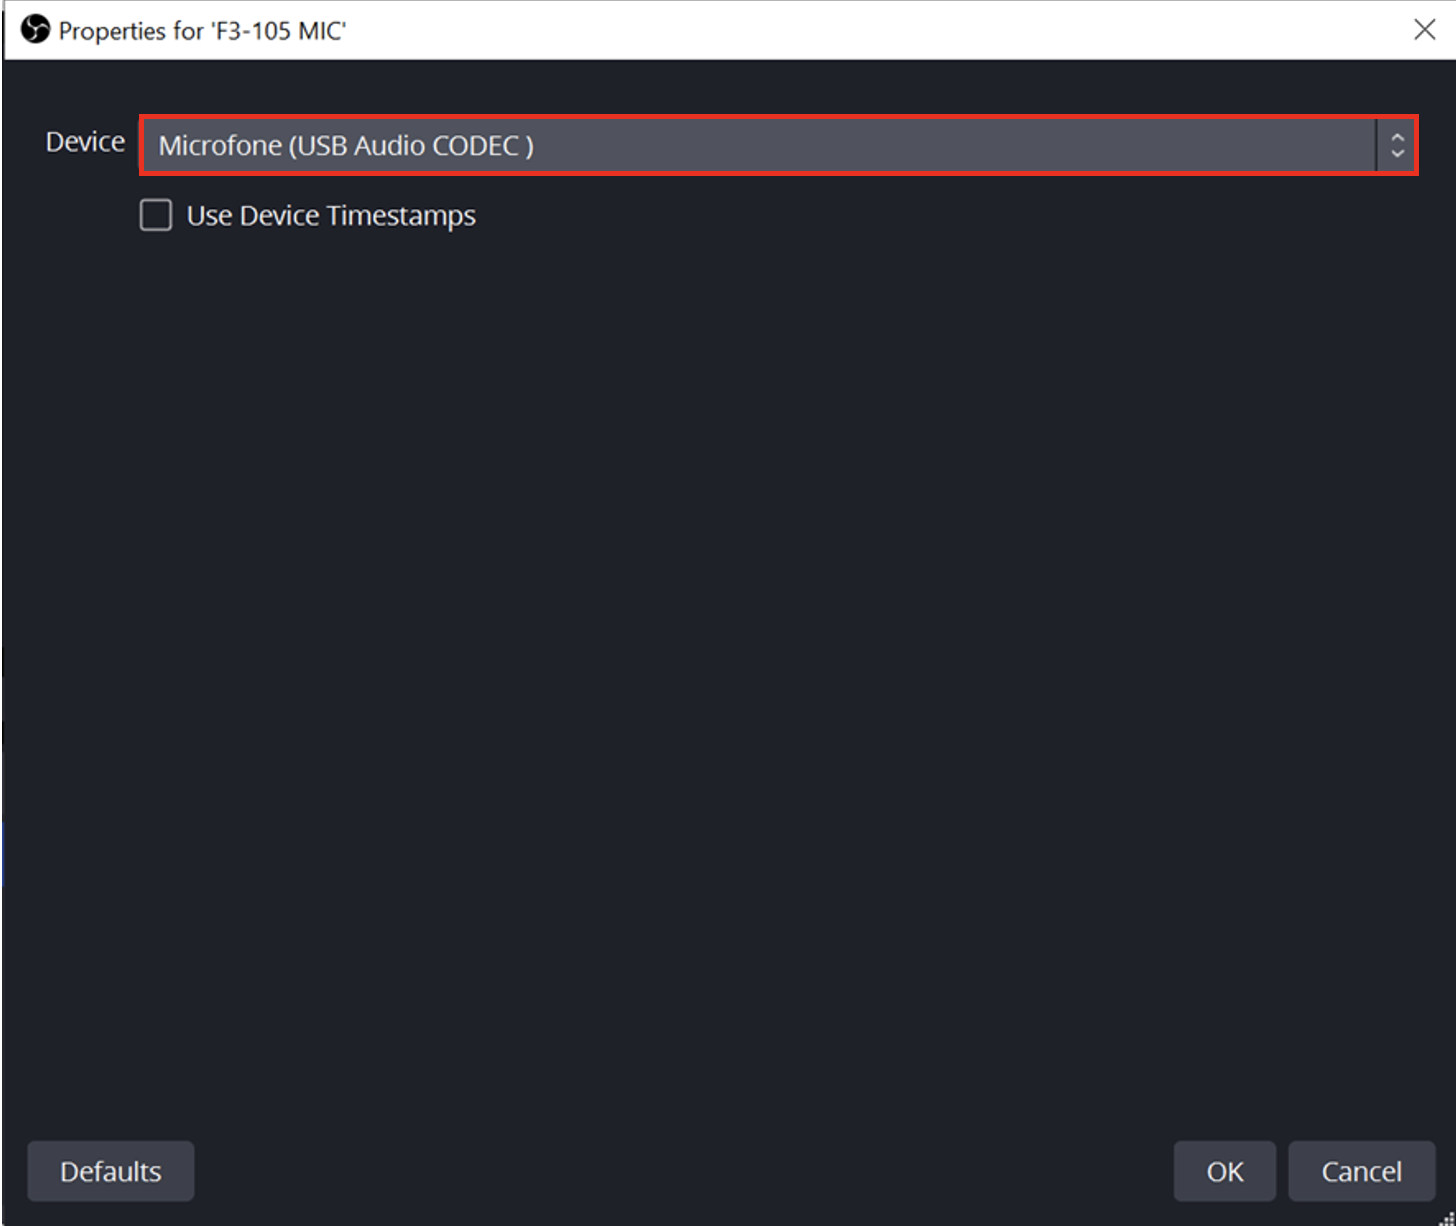
Now you have to select the device type. There are a few options, but choose "Microfone (USB Audio CODEC)". After this, click OK.
You have successfully added an audio source! The name of the microphone should be displayed in the "Sources" box.
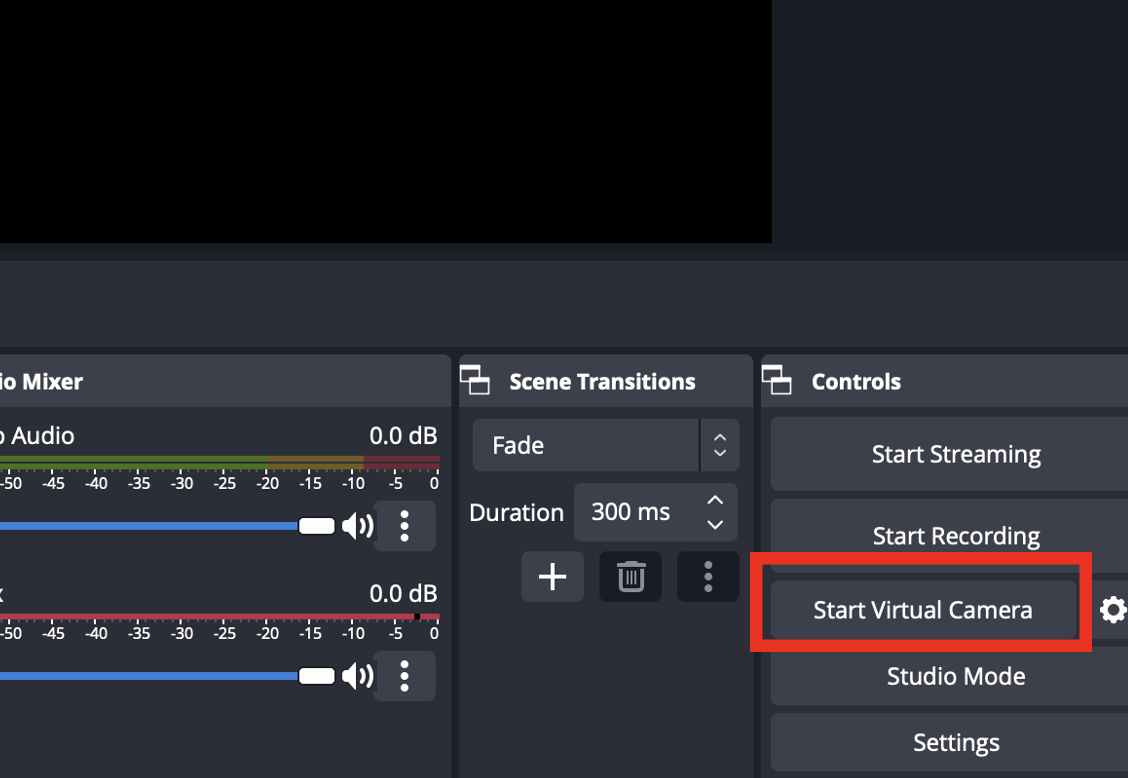
You can now start a virtual camera to share the audio and video from OBS to Zoom.

Was this article helpful?
That’s Great!
Thank you for your feedback
Sorry! We couldn't be helpful
Thank you for your feedback
Feedback sent
We appreciate your effort and will try to fix the article